⚠️ Please note that the content here was translated by a large language model.
Recently, I have been dealing more with the machine room, responsible for coordinating engineers who installed newly purchased machines for the Sanjiangyuan Data Analysis Center and the college’s operations teachers. So, I am summarizing the experience of building a high-performance cluster during this period.
Hardware
Assembly
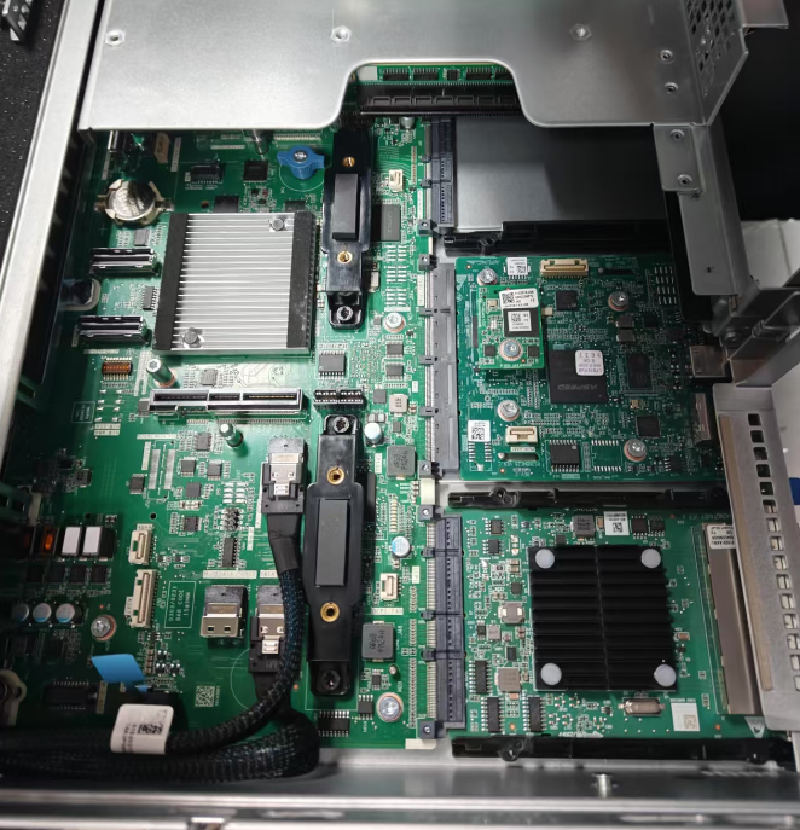
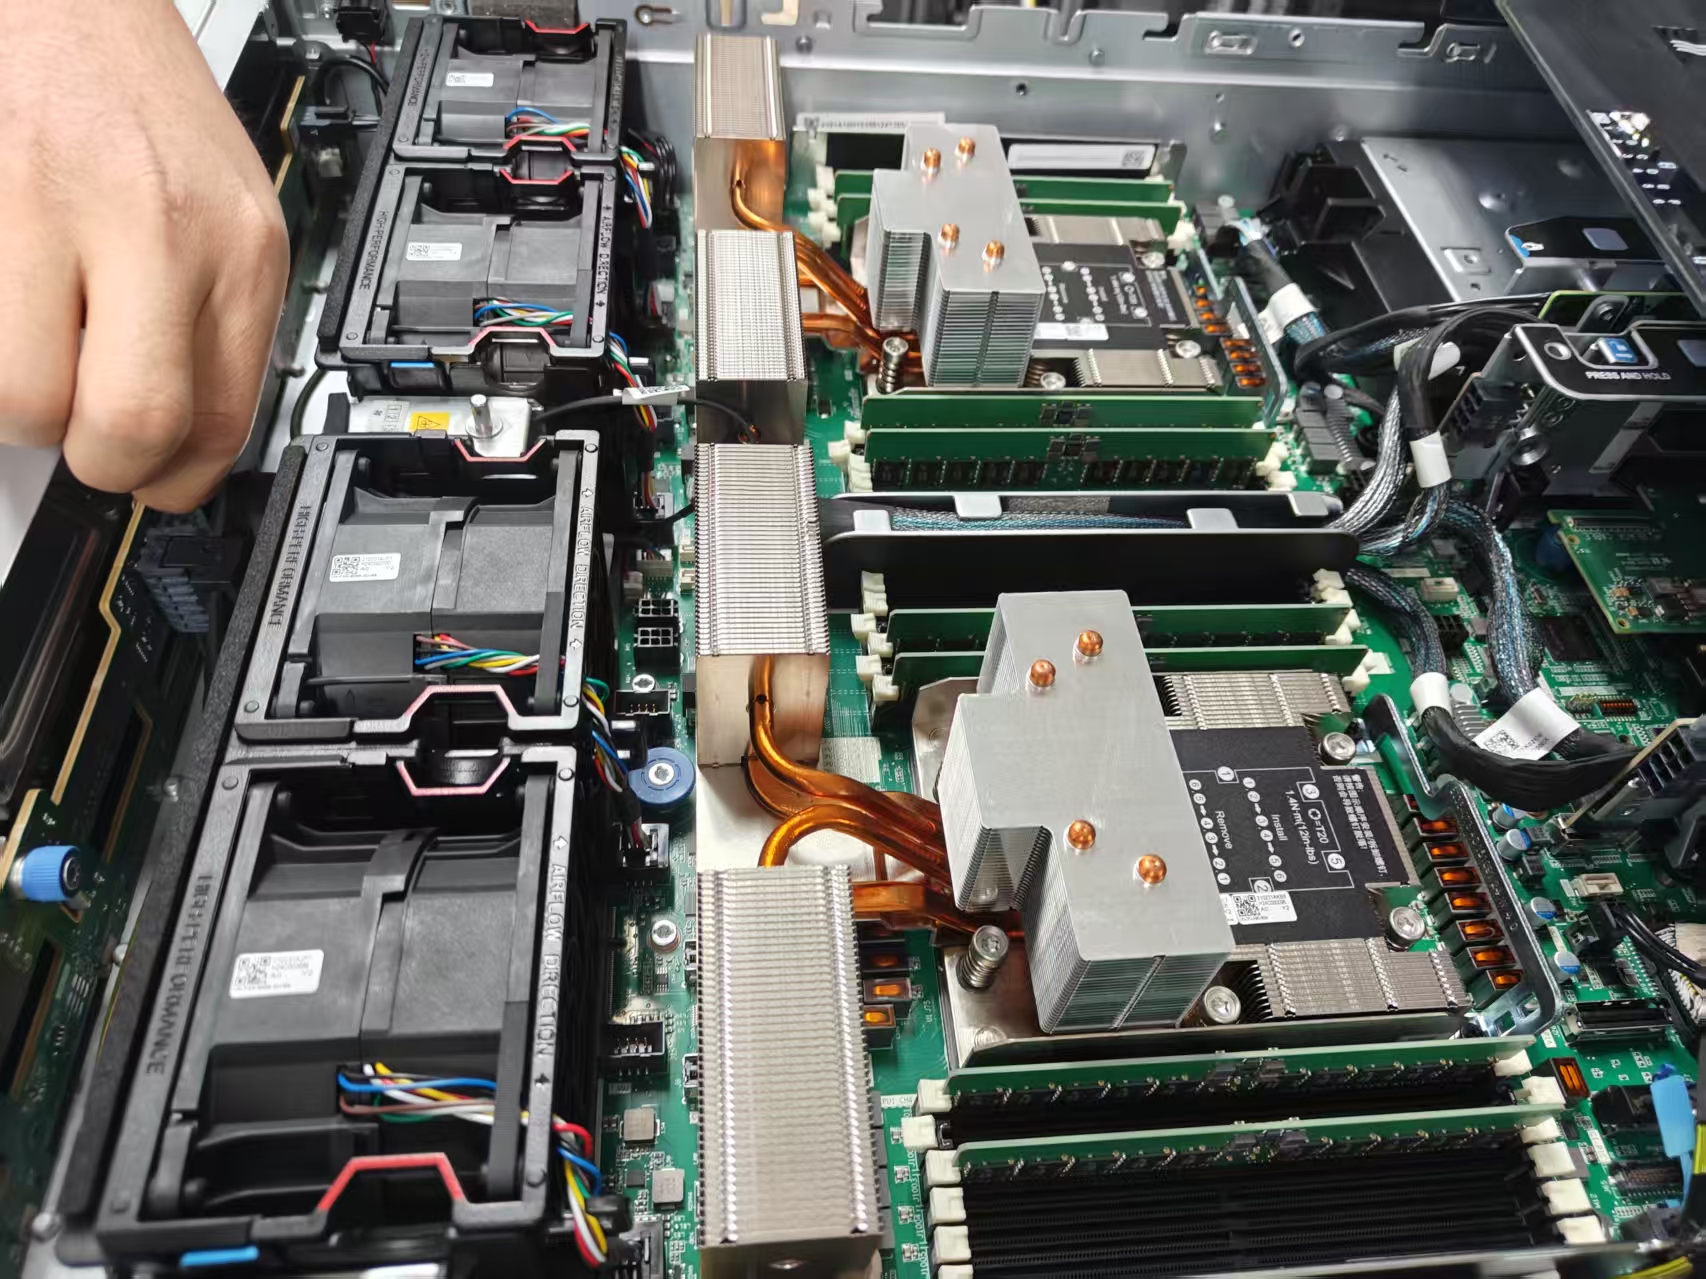
The newly purchased complete servers come with hard drives, memory sticks, Ethernet network cards, and RAID cards already installed. Be sure to ensure that both the main power and backup power are lit during startup. The machine configurations are as follows: two machines with dual Intel processors and two with dual AMD processors. The RDMA network cards were purchased separately: Mellanox MT28908 (ConnectX-6). We borrowed 8 NVIDIA A800 80GB PCIe cards from the High-Performance Computing Center, with an expected topology of four machines and eight cards.
| Server | CPU | Memory | Hard Disk |
|---|---|---|---|
| H3C UniServer R4900 G6 | Intel(R) Xeon(R) GOLD 6542Y(250w)×2 | 32G DDR5 5600×8 | 960G SSD×2 + 4TB SATA×3 + RAID PM8204-2G |
| H3C UniServer R4950 G6 | AMD EPYC 9654 96-Core Processor(360w)×2 | 32G DDR5 4800×8 | 960G SSD×2 + 4TB SATA×3 + RAID PM8204-2G |
Creating Bootable USB Drive
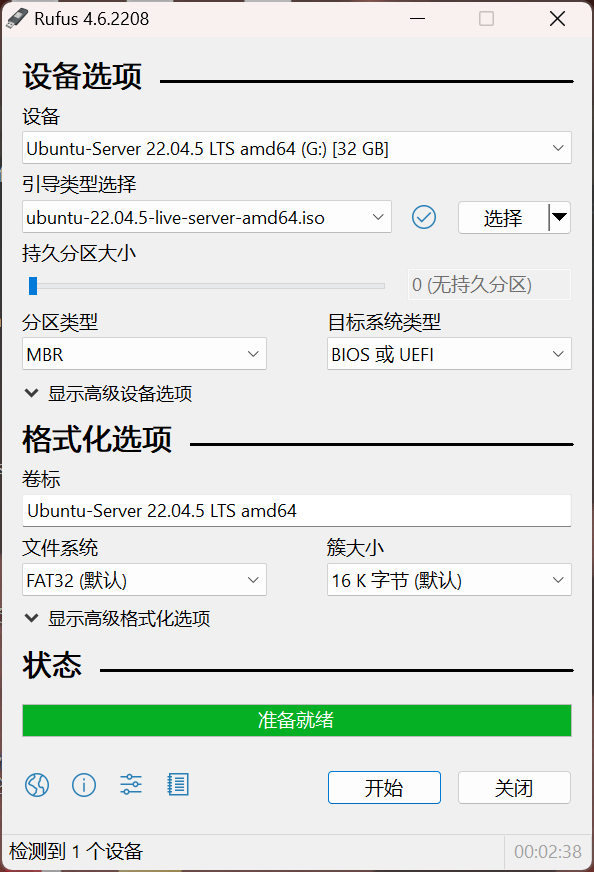
Prepare a bootable ISO, burning software (Rufus or UltraISO), and a USB drive (preferably USB 3.0). Here, we choose the server-side Ubuntu Server 22.04.5 LTS (the previous long-term support version of Ubuntu Server, supported until April 2027). Download the bootable ISO from the Ubuntu official website.

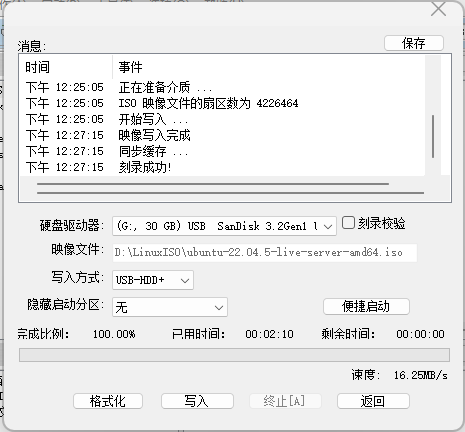
Next, use the burning software to write the image to the disk. For UltraISO, select the write mode as USB-HDD+; for Rufus, set the target system type to BIOS or UEFI. Configure the filesystem and other settings as needed. After formatting the USB drive, write the system image (about 2-3 minutes).
Software
Network Configuration
Usually, during system installation, network configuration is not set initially. After installation, check the network interface names with ip link show. Then, edit /etc/netplan/50-cloud-init.yaml as follows:
| |
Setting the root password
| |
Disabling Linux Kernel Automatic Updates
If not disabled, after each apt update, it will prompt whether to restart services and update. To prevent this, modify the parameters in /etc/apt/apt.conf.d/10periodic and /etc/apt/apt.conf.d/20auto-upgrades to 0.
sudo vim /etc/apt/apt.conf.d/10periodic
Update to:
| |
sudo vim /etc/apt/apt.conf.d/20auto-upgrades
Update to:
| |
Reverse Proxy
Since the compute nodes are not connected to the internet, use the local machine as a jump host for reverse proxy.
Modify Users/username/.ssh/config:
| |
Additionally, recently learned that in .ssh/config, you can configure ProxyJump for seamless jump connections. Note that for passwordless login, the public key must be added to the destination host’s ~/.ssh/authorized_keys.
| |
Useful Preparations
| |
Disk Partitioning
If disks are not recognized, errors like block probing did not discover any disks may occur during system installation. Check if the disks and RAID cards are lit.
| |
NFS Shared Filesystem
| |
NFS Server Node
| |
Client Nodes
| |
Verify RDMA transfer:
| |
InfiniBand Driver
Download drivers: NVIDIA InfiniBand Software | NVIDIA | NVIDIA Developer
MLNX_OFED: Linux InfiniBand Drivers
For older IB versions, be sure to check the Release Notes for support.
Check IB devices:
| |
Start IB’s opensm service:
| |
Verify IB device recognition:
| |
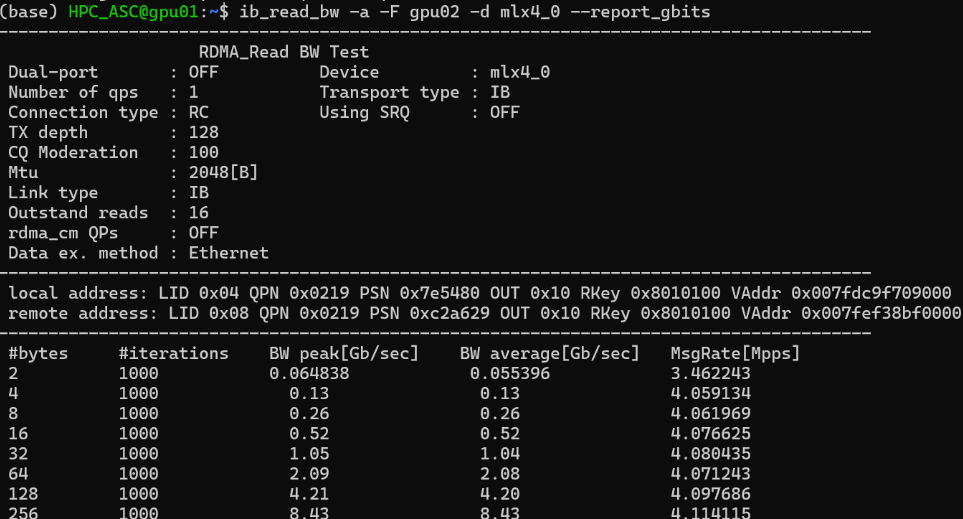
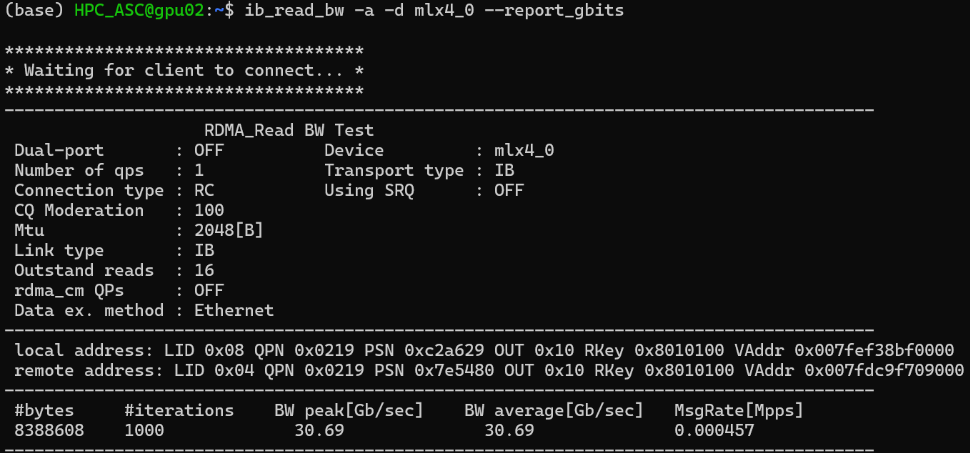
Test server and client IB bandwidth:
| |
Set IB MTU (Maximum Transmission Unit):
| |
Simple test:
ibpingandibping <ip_addr>
CUDA
Disable/Uninstall Nouveau Driver (Optional)
| |
Add the following lines at the end:
| |
Rebuild initramfs and reboot to apply:
| |
Verify with lsmod | grep nouveau. If no output, disabling was successful.
Install Driver
Check GPU model: lspci | grep -i nvidia
Download driver: NVIDIA Driver
For A800/V100 with CUDA12.6: Data Center Driver for Linux x64 560.35.03 | Linux 64-bit | NVIDIA
Uninstall Driver
| |
Install CUDA
Download CUDA: CUDA Toolkit 12.6 Update 3
CUDA Toolkit archive: CUDA Toolkit Archive
NVCC requires the full CUDA toolkit. Download the appropriate version from the official site (preferably via runfile/local). Use commands like wget and sudo sh:
| |
No need to reinstall the driver. After installation, add environment variables:
| |
To access /usr/local/cuda by default, create a symlink:
| |